A. Preparation of micropipettes for DNA injection
1.
Pull 75 mm glass capillary microhematocrits (Drummond Scientific, Broomall, PA)
using a micropipette puller P-97/ IVF (Sutter Instrument, Novato, CA) under the
following conditions: pressure, 500; heat, 800; pull, 30; velocity, 40; time,
1.
2. Cut
off pulled pipettes with forceps at ∼ 1.2 cm from the shoulder of the pipettes.
3. Mark
tips of cut pipettes with a water-resistant magic marker in order to clarify
their ends.
4. Mark
bodies of the pipettes every 5 mm length using the same marker as above.
(1 span with 5 mm corresponds to 5 µl.)
5.
Sterilize the pipettes under the UV lamp in a clean bench for ∼15 min.
B. DNA preparation
1. Purify plasmids using the EndoFree
Plasmid Kit (QIAGEN, Hilden, Germany) according to the manufacture's protocol with the following minor modifications.
∗Wash the QIAGEN-tip capturing DNA with
Buffer QC three times, instead of twice.
∗After 70% ethanol rinse, suspend the DNA
pellet with a small amount (300 µl for the Maxi Kit) of TE, and precipitate again
by adding NaOAc and ethanol. Then, suspend DNA pellet with 1 mM Tris-HCl
(pH7.5), 0.1 mM EDTA.
2. For microinjection, dilute the DNA
solution with PBS to a final concentration of 0.1 to 1 mg/ml.
∗Brighter fluorescence was obtained by
injection of higher concentrations of DNA, and the intensity of fluorescence
seemed to reach plateau at 0.5mg/ml.
C. Electroporation
1. Anesthetize
a timed-pregnant mouse with an intraperioneal injection of 10% Nembutal solution (Nembutal diluted with saline to 10%).
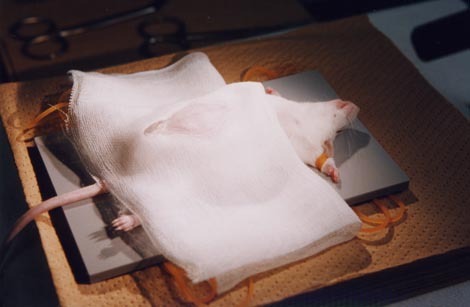
2. Put
the mouse on a working plate with the abdomen upside.
3.
Cover the abdomen with a piece of folded gauze (7 cm × 15 cm) which has a ∼ 3 cm-
long slit in its center.
4.
Clean the gauze with 70% ethanol.
5.
Cut the abdominal skin and wall by scissors.
∗While the skin can be cut for ∼ 3 cm at the
midline, the midline of the abdominal wall should not be cut for well healing.
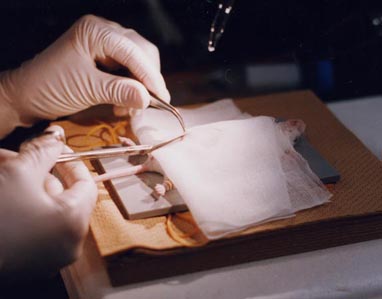
6.
Take out the uterus carefully by pinching gaps between embryos (but not either
the placenta or embryos) with ring-forceps.
∗During
the surgery, the uterus must be kept wet by
dropping warm saline*(saline
should be prewarmed at
37°C).
∗It is
important to take care not to damage either the placenta or the blood vessels connecting
with the uterus.
In
utero
electroporation
7. Inject
1-3 µl of the DNA solution into the ventricle using a mouth-controlled pipette
system with the micropipette.
∗We can
inject the solution approximately into an aimed site, because the surface of the
telencephalon is visible through the uterin wall, by illumination of a
fiber-optics light source.
8. Hold
a DNA-injected embryo in parallel along its antero-posterior axis through the uterus
with forceps-type electrodes, and deliver electric pulses to the embryo.
∗The
electric pulses are generated using ElectroSqurePorator T820 (BTX, San Diego CA)
and each pulse is for duration of 50 ms.
∗Fill a
gap between the electrodes with warm saline*, before electric pulses.
9. Put back the uterus carefully into the abdominal
cavity.
10. Fill the cavity
with warm saline*.
11. Sew
up the abdominal wall and skin with the surgical needle and thread.
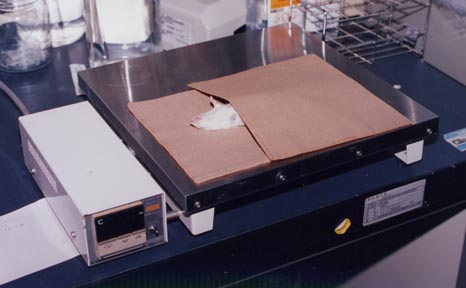
12. Warm
the mouse on a hot plate at 38°C, until the mouse recovers from the anesthetic.
Exo
utero
electroporation
7. Cut
the uterine wall along the antiplacental side carefully not to break the yolk
sac.
∗Embryos
should be clearly visible through the yolk sac after cutting the uterine wall.
8.
Inject 1 to 2 µl of the DNA solution into the ventricle.
9.
Hold a DNA-injected embryo through the yolk sac and deliver electric pulses as
above.
10. Without
sewing the uterine wall, put the embryos back into the abdominal cavity.
11.
Fill the cavity with warm saline*.
12. Sew
up the abdominal wall and skin as above.
13. Warm
the mouse as above.